
本文基于 LibreNMS 官方文档,完整记录一次从零开始的标准化部署过程。部署过程中不引入任何非官方推荐组件…
一、部署目标
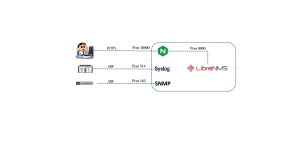
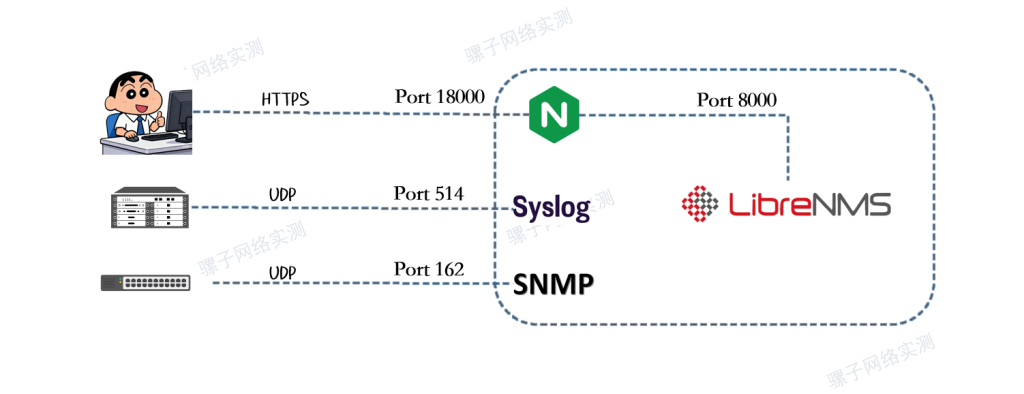
本次 LibreNMS 部署以官方推荐架构为基础,目标是搭建一套结构清晰、运行稳定、便于后续维护的监控系统。
1.1 架构目标
系统运行在 Ubuntu Server 24.04 上,整体采用传统、成熟的部署方式:
- Web 服务使用 Nginx
- PHP 通过 PHP-FPM 独立进程池运行,避免与其他站点相互影响
- 后端数据库使用 MariaDB
- LibreNMS 通过 源码方式部署,不使用 Docker 或容器化方案
- 所有配置均来源于 官方文档推荐做法,不引入额外优化或魔改
1.2 访问与安全目标
在满足功能需求的同时,部署过程兼顾基本的安全性要求:
- Web 访问统一通过 HTTPS,证书使用自签名方式
- 禁用 Nginx 默认站点,仅暴露 LibreNMS 服务
- LibreNMS 程序及相关任务 不以 root 用户运行
1.3 功能目标
部署完成后,LibreNMS 应达到以下运行状态:
- Web 界面可正常访问,并顺利完成初始化安装
- Scheduler 与 Cron 服务正常运行,定时任务无报错
- SNMP 服务可用,能够成功监控本机设备
- 设备数据采集正常,图表能够持续生成且无异常
二、系统时间与时区配置
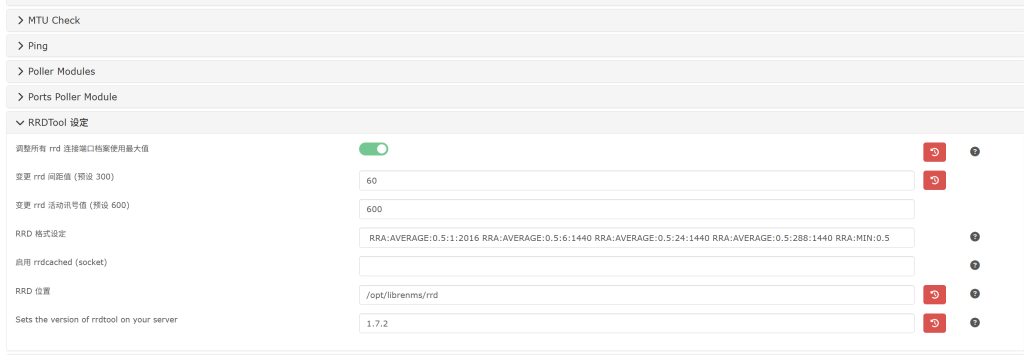
确保系统时间、时区和 NTP 同步正常,避免后续数据采集、RRD 绘图出现时间错乱。
timedatectl set-timezone Asia/Shanghai
timedatectl set-ntp true
timedatectl status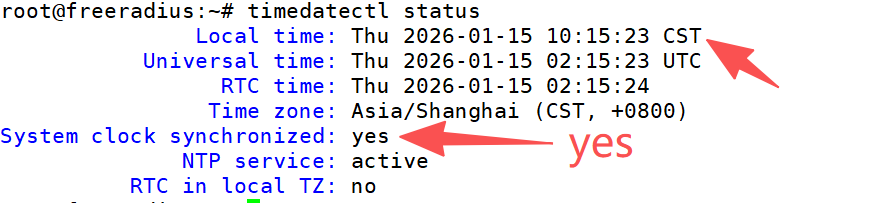
三、安装基础依赖
安装 LibreNMS 运行所需的所有系统组件,包括 Web、数据库、PHP、SNMP、RRDTool 等。
apt install -y acl curl fping git graphviz imagemagick \
mariadb-client mariadb-server mtr-tiny nginx-full nmap \
php-cli php-curl php-fpm php-gd php-gmp php-json php-mbstring \
php-mysql php-snmp php-xml php-zip \
python3-command-runner python3-dotenv python3-pip \
python3-psutil python3-pymysql python3-redis \
python3-setuptools python3-systemd \
rrdtool snmp snmpd traceroute unzip whois vim
四、创建 librenms 系统用户(必须)
LibreNMS 官方要求使用独立用户运行程序,避免使用 root,提升安全性。
useradd librenms -d /opt/librenms -M -r -s "$(which bash)"五、下载 LibreNMS 程序
通过官方 GitHub 仓库获取最新稳定代码。
cd /opt
git clone https://github.com/librenms/librenms.git
设置目录权限(官方原样)
chown -R librenms:librenms /opt/librenms
chmod 771 /opt/librenms

setfacl -d -m g::rwx \
/opt/librenms/rrd \
/opt/librenms/logs \
/opt/librenms/bootstrap/cache/ \
/opt/librenms/storage/

setfacl -R -m g::rwx \
/opt/librenms/rrd \
/opt/librenms/logs \
/opt/librenms/bootstrap/cache/ \
/opt/librenms/storage/
六、安装 PHP 依赖
安装 LibreNMS 所需的 PHP 库,仅安装生产环境所需组件。
su - librenms
./scripts/composer_wrapper.php install --no-dev
exit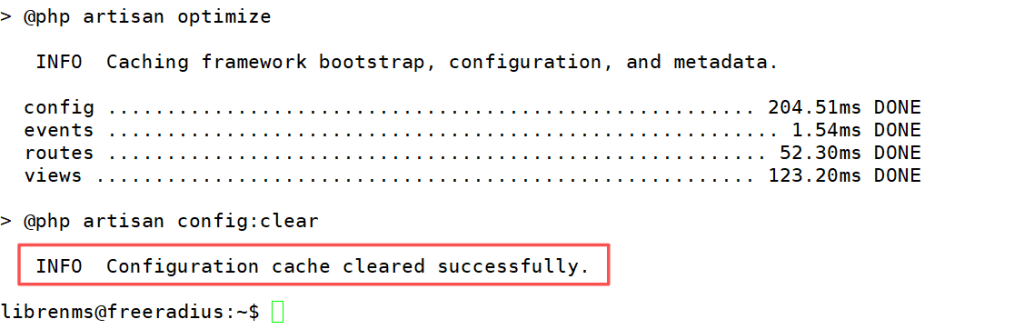
七、配置 PHP
确保 PHP CLI 与 PHP-FPM 使用正确时区,否则会影响图表与数据采集。
编辑以下两个文件,每个都要改:
vi /etc/php/8.3/fpm/php.ini    留意php版本
vi /etc/php/8.3/cli/php.ini    留意php版本
设置:
date.timezone = Asia/Shanghai
八、配置 MariaDB
按照 LibreNMS 官方建议优化 MariaDB 行为,避免大小写及 InnoDB 问题。
编辑配置文件:
vi /etc/mysql/mariadb.conf.d/50-server.cnf在 [mysqld] 或者[mariadbd] 下添加:
innodb_file_per_table=1
lower_case_table_names=0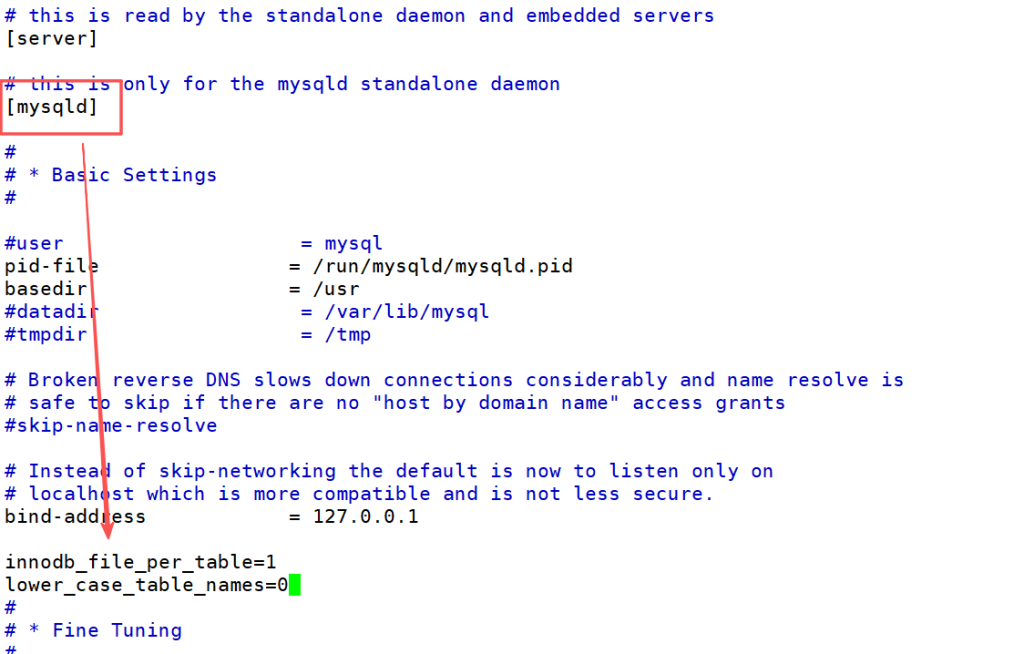
初始化数据库
systemctl enable mariadb
systemctl restart mariadb
mysql -u root
CREATE DATABASE librenms CHARACTER SET utf8mb4 COLLATE utf8mb4_unicode_ci;
CREATE USER 'librenms'@'localhost' IDENTIFIED BY '自行设置数据库密码';
GRANT ALL PRIVILEGES ON librenms.* TO 'librenms'@'localhost';
FLUSH PRIVILEGES;
EXIT;九、配置 PHP-FPM
为 LibreNMS 创建独立的 PHP-FPM 池,避免与其他站点冲突。
cp /etc/php/8.3/fpm/pool.d/www.conf \
   /etc/php/8.3/fpm/pool.d/librenms.conf
编辑:
vi /etc/php/8.3/fpm/pool.d/librenms.conf修改为:
[librenms]
user = librenms
group = librenms
listen = /run/php-fpm-librenms.sock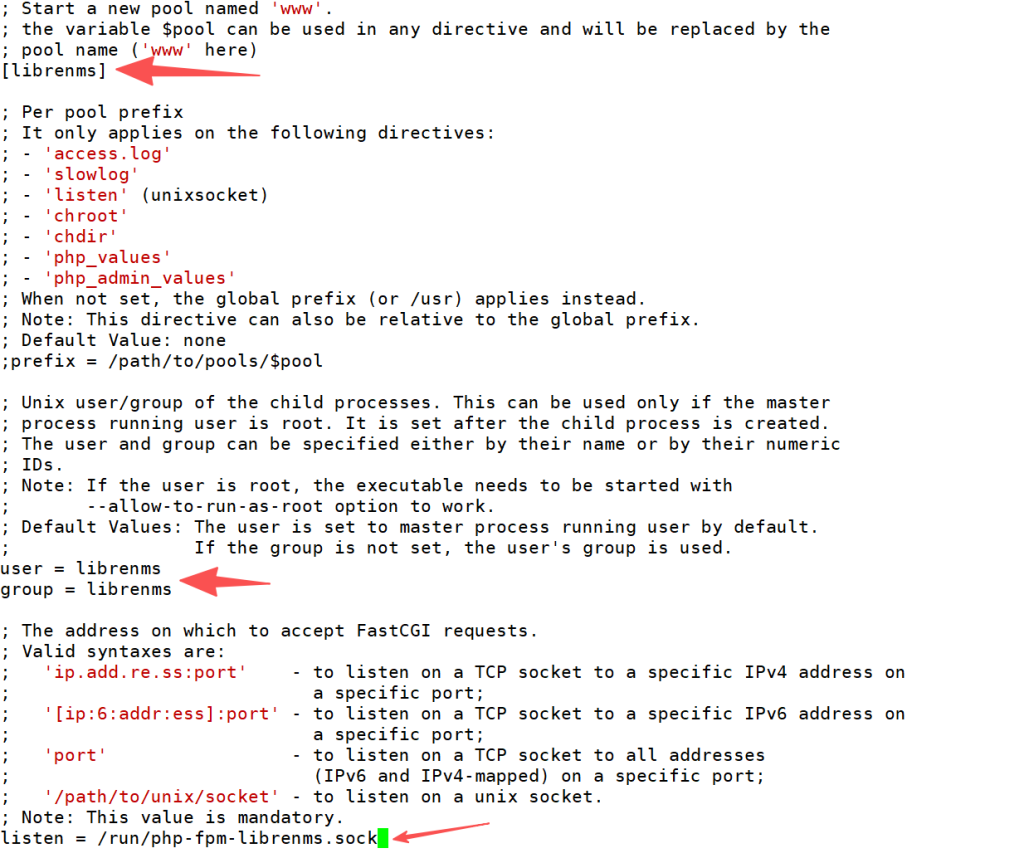
重启服务:
systemctl restart php8.3-fpm十、配置 HTTPS
在内网环境下,使用自签名证书实现 HTTPS 访问。
mkdir -p /etc/nginx/certs/
cd /etc/nginx/certs/
openssl req -x509 -nodes -days 3650 -newkey rsa:2048 \
-keyout librenms.key \
-out librenms.crt \
-subj "/C=CN/ST=Shanghai/L=Shanghai/O=LibreNMS/OU=IT/CN=librenms.local"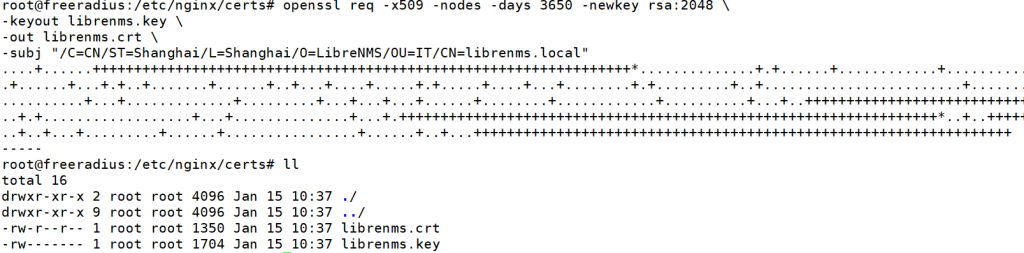
十一、配置 Nginx
通过 Nginx 提供 HTTPS Web 访问,并将 PHP 请求转交给 PHP-FPM。
vi /etc/nginx/conf.d/librenms.conf推荐完整配置(HTTPS + 1886 端口):
server {
    listen 1886 ssl;
    server_name 192.168.5.3;

    ssl_certificate     /etc/nginx/certs/librenms.crt;
    ssl_certificate_key /etc/nginx/certs/librenms.key;

    root /opt/librenms/html;
    index index.php;

    location / {
        try_files $uri $uri/ /index.php?$query_string;
    }

    location ~ \.php$ {
        include fastcgi.conf;
        fastcgi_pass unix:/run/php-fpm-librenms.sock;
    }

    location ~ /\.(?!well-known).* {
        deny all;
    }
}
禁用默认站点并重启服务:
rm /etc/nginx/sites-enabled/default /etc/nginx/sites-available/default
systemctl restart nginx
systemctl restart php8.3-fpm
十二、启用 lnms 命令补全
提升命令行操作体验,支持 Tab 自动补全。
ln -s /opt/librenms/lnms /usr/bin/lnms
cp /opt/librenms/misc/lnms-completion.bash /etc/bash_completion.d/
十三、配置 SNMP(监控本机)
通过 SNMP 将本机作为第一台被监控设备。
cp /opt/librenms/snmpd.conf.example /etc/snmp/snmpd.conf
vi /etc/snmp/snmpd.conf
将:
RANDOMSTRINGGOESHERE修改为:
#这是本服务器的snmp密钥,后续在NMS添加的时候添加这个key
public123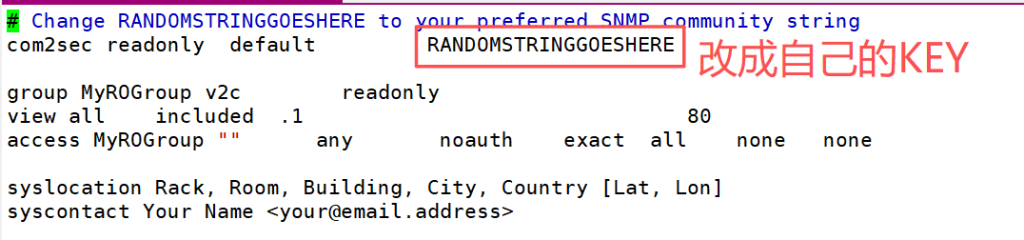
启动服务:
systemctl enable snmpd
systemctl restart snmpd
十四、配置 Cron 与 Scheduler
目的:
确保设备发现、数据采集、告警等任务按计划自动执行。
cp /opt/librenms/dist/librenms.cron /etc/cron.d/librenmscp /opt/librenms/dist/librenms-scheduler.service \
/opt/librenms/dist/librenms-scheduler.timer \
/etc/systemd/system/systemctl enable librenms-scheduler.timer
systemctl start librenms-scheduler.timer确认:
systemctl list-timers | grep librenms
配置日志轮转:
cp /opt/librenms/misc/librenms.logrotate /etc/logrotate.d/librenms十五、Web 安装向导
浏览器访问:
https://192.168.5.3:1886/install按照页面提示完成数据库、账号等配置即可。
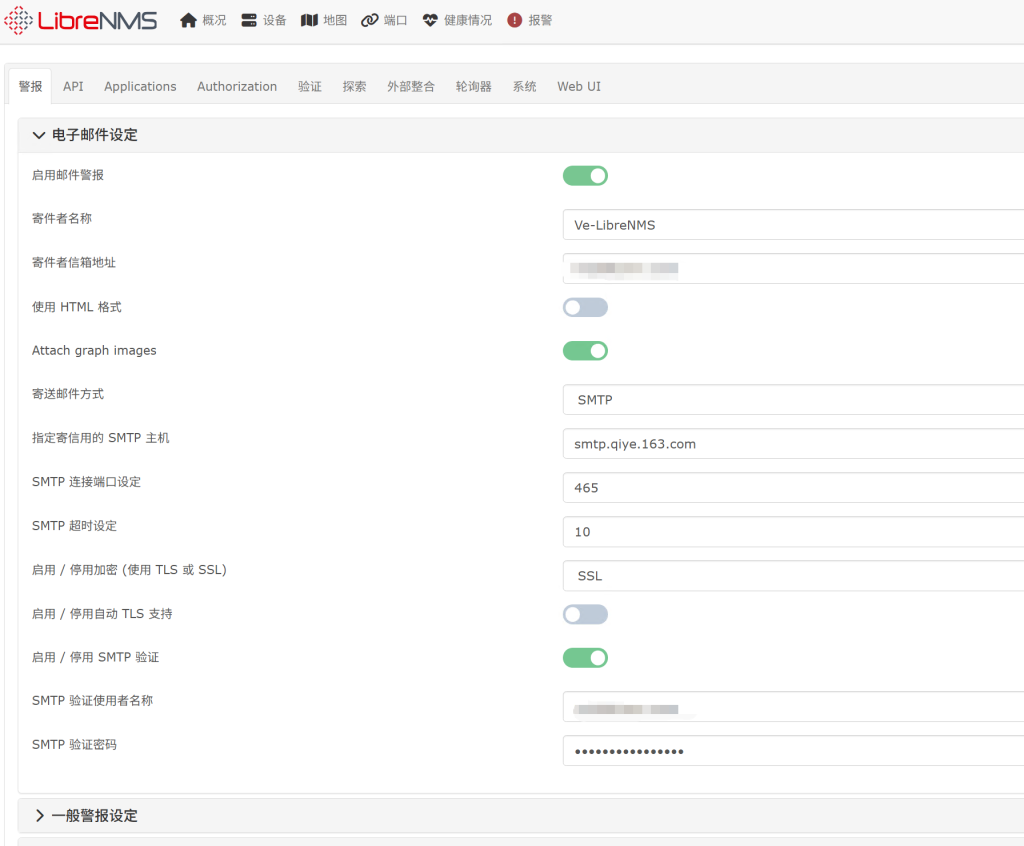
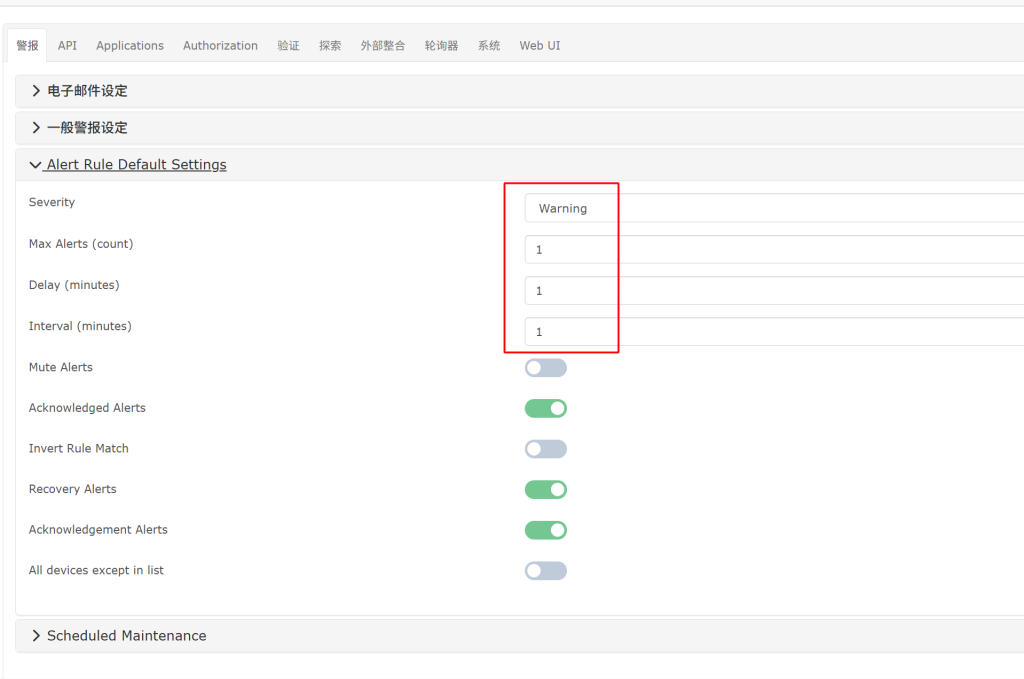
十六、解决检查报错
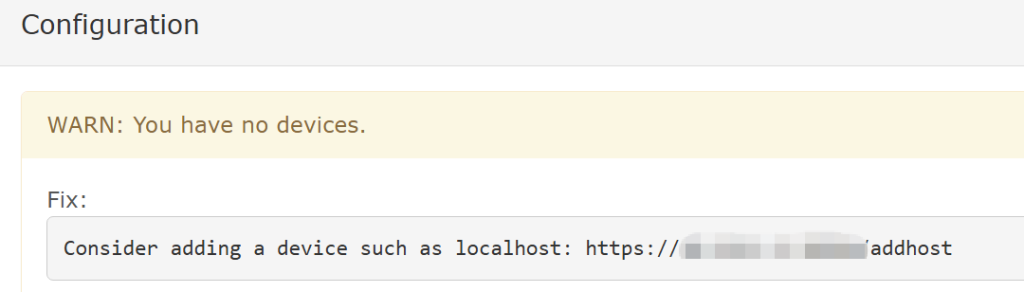
首次登录 LibreNMS ,进入 Web 界面右上角的 配置检查,通常会看到几条系统检查告警。这些告警大多属于初始化阶段的正常现象。
1.未添加设备告警:
是没有添加设备的原因,添加设备就好了。
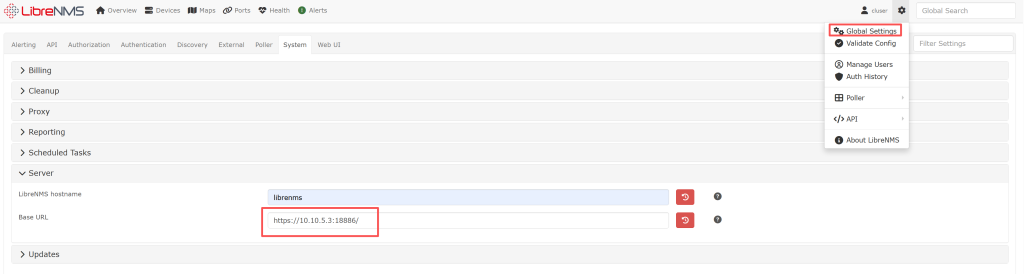
2.base_url 相关告警
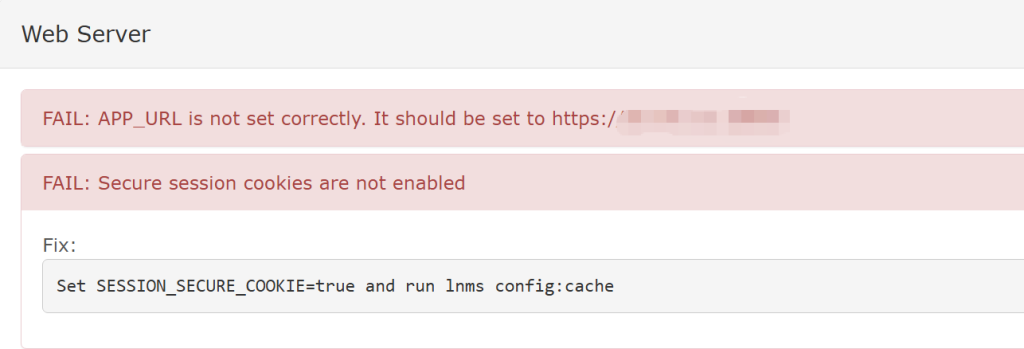
先把这个base_url改了:
编辑配置文件.env:
nano /opt/librenms/.env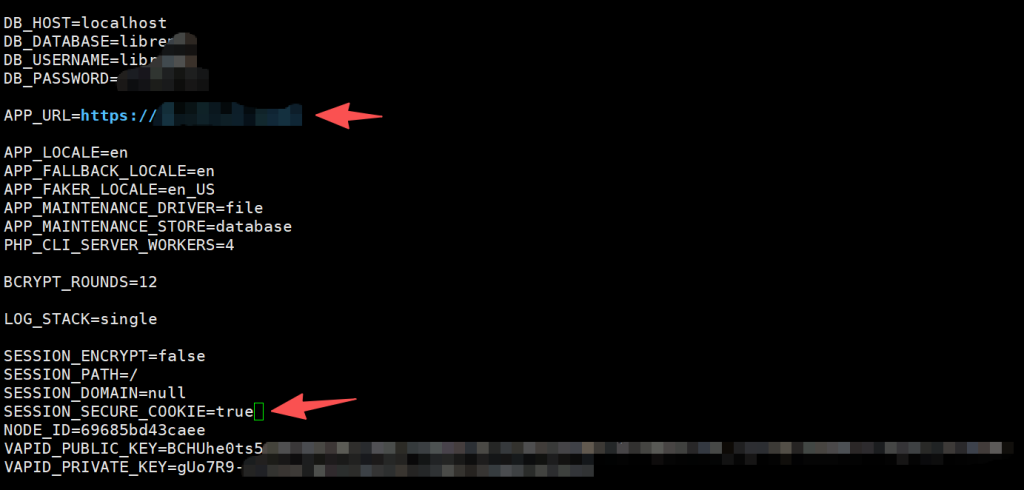
su - librenms
lnms config:cache
我一般喜欢reboot一下服务器,校验是不是正常。
再检查一下,报错都没了:

十七、个人记录
root@librenms:~# cat /etc/cron.d/librenms
# 1. 发现新设备:保持 5 分钟即可,不需要太频繁
*/5  * * * * librenms    /opt/librenms/discovery.php -h new >> /dev/null 2>&1

# 2. 核心轮询器:必须改为每分钟一次 (*)
* * * * * librenms    /opt/librenms/cronic /opt/librenms/poller-wrapper.py 16

# 3. 告警系统:原本就是每分钟一次 (*),保持不动
* * * * * librenms    /opt/librenms/alerts.php >> /dev/null 2>&1

# 4. 账单数据采集:既然你要做账,这个必须改为每分钟一次 (*)
* * * * * librenms    /opt/librenms/poll-billing.php >> /dev/null 2>&1

# 5. 账单额度计算:保持每小时运行一次即可,不需要改
01   * * * * librenms    /opt/librenms/billing-calculate.php >> /dev/null 2>&1

# 6. 服务检查:建议同步改为每分钟一次,提高监控精度
* * * * * librenms    /opt/librenms/check-services.php >> /dev/null 2>&1

# 7. 自动更新与维护:保持每天一次,千万不要改
19   0    * * * librenms    /opt/librenms/daily.sh >> /dev/null 2>&1
root@librenms:~#